


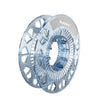


All Fly Line Specs (Weights & Lengths)
|
|
|
|
|
|
|
|
|
|
|
Product Name |
Density |
Weight |
Head Length |
Total Length |
Tip Diameter |
Running Line Diameter |
Looped at Rear |
Looped at front |
|
|
|
|
|
|
|
|
|
|
|
Proline #1 |
Float |
6.5g at 30' |
30' |
90' |
0.85mm |
0.70mm |
Welded |
Welded |
|
Proline #2 |
Float |
7.8g at 30' |
30' |
90' |
0.85mm |
0.70mm |
Welded |
Welded |
|
Proline #3 |
Float |
8.2.g at 30' |
30' |
90' |
0.85mm |
0.70mm |
Welded |
Welded |
|
Proline #4 |
Float |
9.5g at 30' |
30' |
90' |
0.90mm |
0.80mm |
Welded |
Welded |
|
Proline #5 |
Float |
17g at 40 |
40' |
120' |
1.0mm |
0.80mm |
Welded |
Welded |
|
Proline #6 |
Float |
19g at 40' |
40' |
120' |
1.10mm |
0.90mm |
Welded |
Welded |
|
Proline #7 |
Float |
21g at 45' |
45' |
120' |
1.10mm |
1.0mm |
Welded |
Welded |
|
Proline #8 |
Float |
23g at 40' |
40’ |
120' |
1.20mm |
1.0mm |
Welded |
Welded |
|
|
|
|
|
|
|
|
|
|
|
Short Head #4 |
Float / High Float Tip |
12.5g at 31' |
31' |
120' |
0.90mm |
0.70mm |
Welded |
Welded |
|
Short Head #5 |
Float / High Float Tip |
15g at 34' |
34' |
120' |
1.0mm |
0.70mm |
Welded |
Welded |
|
Short Head #6 |
Float / High Float Tip |
18g at 34' |
34' |
120' |
1.10mm |
0.75mm |
Welded |
Welded |
|
Short Head #7 |
Float / High Float Tip |
20g at 39' |
39' |
120' |
1.10mm |
0.75mm |
Welded |
Welded |
|
Short Head #8 |
Float / High Float Tip |
23g at 39' |
39' |
120' |
1.20mm |
0.85mm |
Welded |
Welded |
|
Short Head #9 |
Float / High Float Tip |
26g at 39' |
39' |
120' |
1.30mm |
0.85mm |
Welded |
Welded |
|
|
|
|
|
|
|
|
|
|
|
Competition #5 |
Float / High Float Tip |
17g at 40 |
40' |
120' |
1.0mm |
0.70mm |
Welded |
Welded |
|
Competition #6 |
Float / High Float Tip |
19g at 40' |
40' |
120' |
1.10mm |
0.75mm |
Welded |
Welded |
|
Competition #7 |
Float / High Float Tip |
21g at 45' |
45' |
120' |
1.10mm |
0.75mm |
Welded |
Welded |
|
Competition #8 |
Float / High Float Tip |
23g at 40' |
40’ |
120' |
1.20mm |
0.85mm |
Welded |
Welded |
|
Competition #9 |
Float / High Float Tip |
26g at 40' |
40’ |
120' |
1.30mm |
0.85mm |
Welded |
Welded |
|
|
|
|
|
|
|
|
|
|
|
Long Head #2 |
Float / High Float Tip |
5.5g at 30' |
39' |
100' |
0.85mm |
0.70mm |
Welded |
Welded |
|
Long Head #3 |
Float / High Float Tip |
6.8g at 30' |
39' |
100' |
0.90mm |
0.70mm |
Welded |
Welded |
|
Long Head #4 |
Float / High Float Tip |
7.6g at 30' |
39' |
100' |
1.0mm |
0.70mm |
Welded |
Welded |
|
Long Head #5 |
Float / High Float Tip |
8.8g at 30' |
39' |
110' |
1.10mm |
0.70mm |
Welded |
Welded |
|
Long Head #6 |
Float / High Float Tip |
27g at 55' |
55' |
110' |
1.10mm |
0.75mm |
Welded |
Welded |
|
Long Head #7 |
Float / High Float Tip |
29g at 55' |
55' |
110' |
1.20mm |
0.75mm |
Welded |
Welded |
|
Long Head #8 |
Float / High Float Tip |
31g at 55' |
55' |
110' |
1.20mm |
0.75mm |
Welded |
Welded |
|
|
|
|
|
|
|
|
|
|
|
Clear Float #2 |
Float |
5.5g at 30' |
39' |
100' |
0.85mm |
0.70mm |
Welded |
Welded |
|
Clear Float #3 |
Float |
6.8g at 30' |
39' |
100' |
0.90mm |
0.70mm |
Welded |
Welded |
|
Clear Float #4 |
Float |
7.6g at 30' |
39' |
100' |
1.0mm |
0.70mm |
Welded |
Welded |
|
Clear Float #5 |
Float |
8.8g at 30' |
39' |
110' |
1.10mm |
0.70mm |
Welded |
Welded |
|
Clear Float #6 |
Float |
27g at 55' |
55' |
110' |
1.10mm |
0.75mm |
Welded |
Welded |
|
Clear Float #7 |
Float |
29g at 55' |
55' |
110' |
1.20mm |
0.75mm |
Welded |
Welded |
|
Clear Float #8 |
Float |
31g at 55' |
55' |
110' |
1.20mm |
0.75mm |
Welded |
Welded |
|
|
|
|
|
|
|
|
|
|
|
Clear Intermediate #2 |
Intermediate |
5.5g at 30' |
39' |
100' |
0.85mm |
0.70mm |
Welded |
Welded |
|
Clear Intermediate #3 |
Intermediate |
6.8g at 30' |
39' |
100' |
0.90mm |
0.70mm |
Welded |
Welded |
|
Clear Intermediate #4 |
Intermediate |
7.6g at 30' |
39' |
100' |
1.0mm |
0.70mm |
Welded |
Welded |
|
Clear Intermediate #5 |
Intermediate |
8.8g at 30' |
39' |
110' |
1.10mm |
0.70mm |
Welded |
Welded |
|
Clear Intermediate #6 |
Intermediate |
27g at 55' |
55' |
110' |
1.10mm |
0.75mm |
Welded |
Welded |
|
Clear Intermediate #7 |
Intermediate |
29g at 55' |
55' |
110' |
1.20mm |
0.75mm |
Welded |
Welded |
|
Clear Intermediate #8 |
Intermediate |
31g at 55' |
55' |
110' |
1.20mm |
0.75mm |
Welded |
Welded |
|
|
|
|
|
|
|
|
|
|
|
Jeremy Lucas Microthin #0 |
Float / High Float Tip |
5.2g at 30' |
33' |
90' |
0.85mm |
0.65mm |
Exposed |
Welded |
|
Jeremy Lucas Microthin #1 |
Float / High Float Tip |
6.5g at 30' |
33' |
90' |
0.85mm |
0.70mm |
Exposed |
Welded |
|
Jeremy Lucas Microthin #2 |
Float / High Float Tip |
7.8g at 30' |
33' |
90' |
0.85mm |
0.70mm |
Exposed |
Welded |
|
Jeremy Lucas Microthin #3 |
Float / High Float Tip |
8.6g at 30' |
33' |
90' |
0.90mm |
0.70mm |
Exposed |
Welded |
|
Jeremy Lucas Microthin #4 |
Float / High Float Tip |
9.8g at 30' |
33' |
90' |
1.0mm |
0.70mm |
Exposed |
Welded |
|
|
|
|
|
|
|
|
|
|
|
Stuart Crofts Microthin #1 |
Float / High Float Tip |
6.5g at 30' |
30' |
90' |
0.85mm |
0.70mm |
Exposed |
Welded |
|
Stuart Crofts Microthin #2 |
Float / High Float Tip |
7.8g at 30' |
30' |
90' |
0.85mm |
0.70mm |
Exposed |
Welded |
|
Stuart Crofts Microthin #3 |
Float / High Float Tip |
8.2.g at 30' |
30' |
90' |
0.85mm |
0.70mm |
Exposed |
Welded |
|
Stuart Crofts Microthin #4 |
Float / High Float Tip |
9.5g at 30' |
30' |
90' |
0.90mm |
0.70mm |
Exposed |
Welded |
|
|
|
|
|
|
|
|
|
|
|
World Nymph |
Float |
N/A |
90’ |
90’ |
0.53mm |
0.53mm |
Exposed |
Exposed |
|
|
|
|
|
|
|
|
|
|
|
Slow Sinking Intermedaite SSI #5 |
1.2 ips |
17g at 36' |
36' |
120' |
1.0mm |
0.70mm |
Welded |
Welded |
|
Slow Sinking Intermedaite SSI #6 |
1.2 ips |
19g at 36' |
36' |
120' |
1.10mm |
0.75mm |
Welded |
Welded |
|
Slow Sinking Intermedaite SSI #7 |
1.2 ips |
21g at 38' |
38' |
120' |
1.20mm |
0.75mm |
Welded |
Welded |
|
Slow Sinking Intermedaite SSI #8 |
1.2 ips |
23.5g at 38' |
38' |
120' |
1.30mm |
0.85mm |
Welded |
Welded |
|
|
|
|
|
|
|
|
|
|
|
Git Down Float / Inter #5 |
Float / 1.2ips |
17g at 36' |
36' |
120' |
1.10mm |
0.70mm |
Welded |
Welded |
|
Git Down Float / Inter #6 |
Float / 1.2ips |
19g at 36' |
36' |
120' |
1.10mm |
0.75mm |
Welded |
Welded |
|
Git Down Float / Inter #7 |
Float / 1.2ips |
21g at 38' |
38' |
120' |
1.20mm |
0.75mm |
Welded |
Welded |
|
Git Down Float / Inter #8 |
Float / 1.2ips |
23.5g at 38' |
38' |
120' |
1.30mm |
0.85mm |
Welded |
Welded |
|
|
|
|
|
|
|
|
|
|
|
Git Down Inter / 3ips #5 |
1.2ips / 3ips |
17g at 36' |
36' |
120' |
1.10mm |
0.70mm |
Welded |
Welded |
|
Git Down Inter / 3ips #6 |
1.2ips / 3ips |
19g at 36' |
36' |
120' |
1.10mm |
0.75mm |
Welded |
Welded |
|
Git Down Inter / 3ips #7 |
1.2ips / 3ips |
21g at 38' |
38' |
120' |
1.20mm |
0.75mm |
Welded |
Welded |
|
Git Down Inter / 3ips #8 |
1.2ips / 3ips |
23.5g at 38' |
38' |
120' |
1.30mm |
0.85mm |
Welded |
Welded |
|
|
|
|
|
|
|
|
|
|
|
Git Down 3 ips / 5 ips #5 |
3 ips / 5 ips |
17g at 36' |
36' |
120' |
1.10mm |
0.70mm |
Welded |
Welded |
|
Git Down 3 ips / 5 ips #6 |
3 ips / 5 ips |
19g at 36' |
36' |
120' |
1.10mm |
0.75mm |
Welded |
Welded |
|
Git Down 3 ips / 5 ips #7 |
3 ips / 5 ips |
21g at 38' |
38' |
120' |
1.20mm |
0.75mm |
Welded |
Welded |
|
Git Down 3 ips / 5 ips #8 |
3 ips / 5 ips |
23.5g at 38' |
38' |
120' |
1.30mm |
0.85mm |
Welded |
Welded |
|
|
|
|
|
|
|
|
|
|
Featured collection